The Ultimate Guide: 7 Simple Steps for Making Your Own Tinctures
Making your own tinctures is one of the most empowering skills you can develop on your journey toward natural wellness and self-sufficiency. While the rows of amber bottles at health food stores can be prohibitively expensive, the process of creating these concentrated liquid extracts at home is surprisingly simple, cost-effective, and allows for total control over the quality of your ingredients.
A tincture is essentially a potent herbal extract created by soaking plant material in a solvent—usually alcohol, glycerin, or vinegar—to pull out the active medicinal compounds. Unlike herbal teas, which have a short shelf life and milder potency, a well-made tincture can remain shelf-stable for three to five years while providing a highly concentrated dose of healing properties. Whether you are looking to support your immune system, improve your sleep, or manage daily stress, mastering “kitchen alchemy” allows you to transform simple garden herbs into professional-grade remedies.
In this ultimate guide, we will walk you through seven straightforward steps to move from plant to pipette, ensuring you have the confidence to build a home apothecary that is both safe and effective.
7 Simple Steps for Making Your Own Tinctures
Step 1: Select Your Herbs (Fresh vs. Dried)
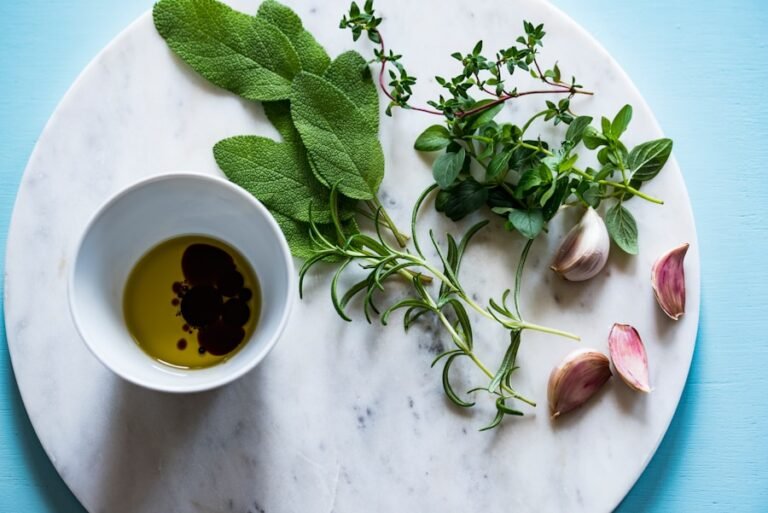
When making your own tinctures, the foundation of a potent tincture lies in the quality of the plant material you choose. Generally, you will work with either fresh or dried herbs, and the choice often depends on the specific plant’s properties and the season. According to the American Botanical Council, using the correct plant part—whether it be the root, leaf, flower, or bark—is critical for ensuring the presence of the desired therapeutic compounds.
Working with Fresh Herbs
Fresh herbs are often preferred for plants that lose their aromatic oils or volatile compounds quickly after harvest, such as Lemon Balm or Milky Oat tops. If you are harvesting from your own garden, ensure you are picking them at their peak potency—usually in the morning after the dew has dried but before the sun is at its hottest. When using fresh material, it is important to chop the herbs finely to increase the surface area for the solvent to penetrate.
Working with Dried Herbs
If you are making your own tinctures, dried herbs are the more accessible choice for many beginners and are ideal for roots (like Echinacea) or barks. Because the water content has been removed, dried herbs are more concentrated by weight, meaning you will need less material than you would if using fresh plants. When sourcing, look for organic suppliers like Mountain Rose Herbs to ensure your tinctures are free from synthetic pesticides or heavy metals.
Determining the “Why”
Before you begin, identify the specific wellness goal you are targeting. For example:
Immune Support: Elderberry or Echinacea.
Relaxation: Valerian Root or Passionflower.
Digestive Aid: Peppermint or Ginger.
Once you have selected your herb and ensured it is clean and free of debris, you are ready to move on to selecting the liquid that will extract its healing properties.
Step 2: Choose Your Menstruum (The Solvent)
The liquid you use to extract the medicinal properties from your herbs is called the menstruum. While there are several options available, your choices since you are making your own tinctures depends on the specific constituents you wish to extract and whether you prefer an alcohol-based or alcohol-free remedy.
The Gold Standard: Alcohol
For most herbalists making your own tinctures, high-quality alcohol is the preferred solvent because it is incredibly efficient at extracting both water-soluble and fat-soluble compounds, such as alkaloids and resins. The National Center for Complementary and Integrative Health (NCCIH) notes that alcohol-based extracts are highly stable and have a significantly longer shelf life than other preparations.
80 to 100-Proof Vodka: This is the most common choice for beginners. It contains approximately 40–50% alcohol and 50–60% water, making it ideal for dried herbs.
190-Proof Grain Alcohol: This is often reserved for fresh herbs with high water content or specific resins (like Propolis) that require a much stronger solvent to break down.
Alcohol-Free Alternatives
If you are making remedies for children, pets, or individuals with alcohol sensitivities, you can use alternative solvents:
Vegetable Glycerin: This results in a “glycerite.” While it is sweet and palatable, it is a weaker solvent than alcohol and typically only has a shelf life of 12 to 24 months.
Apple Cider Vinegar: Often used for “acetracts,” vinegar is excellent for extracting minerals and vitamins. It is a staple in traditional recipes like Fire Cider, though it is not as effective at extracting resins or essential oils.
Quality Matters
Regardless of which menstruum you choose, ensure it is fit for human consumption. Never use “rubbing” or isopropyl alcohol, as these are toxic if ingested. Your goal is to choose a solvent that aligns with the chemistry of the plant—for instance, roots often require a stronger “bite” than delicate flowers.
Step 3: Prepare Your Materials
Before you begin the extraction process, it is essential to have a clean, organized workspace and the correct tools. Because tinctures sit for several weeks, using the wrong materials can lead to contamination or the degradation of the herbal properties.
The Essential Checklist
To ensure your tincture remains pure and shelf-stable, gather the following items:
Glass Mason Jars: Use clear glass jars with tight-fitting lids. Glass is non-reactive, meaning it won’t leach chemicals into your solvent—a common concern with plastic containers.
Wax Paper or Plastic Wrap: If you are using a metal lid with an alcohol or vinegar menstruum, place a piece of wax paper between the jar and the lid to prevent corrosion.
Fine-Mesh Strainer or Cheesecloth: You will need this later to separate the plant material from the liquid. High-quality unbleached cheesecloth is often preferred for its ability to be squeezed tightly.
Amber Glass Dropper Bottles: Once finished, your tincture should be moved to dark glass bottles. These protect the delicate compounds from UV light, which can cause “photodegradation” and weaken the medicine.
Sterilization and Cleanliness
While tinctures are naturally self-preserving due to their alcohol content, you should always start with sterilized equipment. Wash your jars in hot, soapy water or run them through a high-heat dishwasher cycle. As noted by the FDA’s guidelines on food safety, preventing cross-contamination at the start of any preparation is the best way to ensure a long-lasting and safe final product.
Organization
Clear off a dedicated space in your kitchen or “herb corner.” Having your herbs, solvent, and jars ready before you start prevents the mess of handling liquids and plant matter simultaneously. Once your workspace is prepped and your jars are sparkling clean, you are ready to begin the actual assembly.
Step 4: The Folk Method (Measuring and Filling)
While professional herbalists often use precise weight-to-volume ratios (such as 1:5 for dried herbs), most home medicine makers find success using the “Folk Method.” This traditional approach relies on visual proportions rather than scales, making it an accessible entry point for beginners.
Filling Your Jar
The amount of herb you use depends largely on whether you are working with dried or fresh material:
For Dried Herbs: Fill your glass jar about 1/2 full. Dried herbs are concentrated and will expand as they rehydrate in the solvent.
For Fresh Herbs: Fill your jar about 2/3 to 3/4 full. Since fresh herbs contain their own water, you need a higher volume of plant material to ensure a potent extract.
The Pour
Once your herbs are in the jar, pour your chosen menstruum (the solvent) over the herbs until they are completely submerged. It is vital to leave about one to two inches of headspace at the top of the jar. This space allows the herbs to expand and ensures there is enough room for the liquid to circulate when you shake the jar.
Eliminating Air Pockets
After pouring, use a clean butter knife or a glass stir rod to gently poke the herbs and release any trapped air bubbles. Oxidation can degrade the quality of herbal preparations, so ensuring the herbs are fully “tucked in” under the liquid line is a key step in preservation. If the herbs soak up the liquid immediately, add a little more solvent to keep them covered.
Step 5: The Extraction Phase (The Wait)
Once your jar is sealed and labeled, the real work begins—though it requires more patience than labor. This stage, known as maceration, is when the solvent slowly breaks down the plant’s cell walls to pull the medicinal constituents into the liquid.
Finding the Right Environment
Store your jar in a cool, dark place, such as a kitchen cabinet or a pantry. While it might be tempting to display your beautiful jars on a sunny windowsill, ultraviolet light can rapidly degrade the chemical compounds in the herbs. Light exposure can catalyze the breakdown of organic molecules, significantly reducing the potency of your final extract.
The “Daily Shake”
Your tincture should sit for a minimum of four to six weeks. During this time, it is vital to shake the jar daily. This agitation ensures that the solvent is consistently circulating around all the plant material, preventing the herbs from settling at the bottom and ensuring an even, maximum extraction. Think of it as a daily check-in with your medicine; if you notice the herbs have absorbed so much liquid that they are no longer submerged, simply top it off with a bit more of your menstruum.
When to Wait Longer
While six weeks is the standard, tougher materials like roots, barks, or berries can benefit from a longer maceration period of up to eight weeks. The goal is to allow enough time for the solvent to become dark, opaque, and highly aromatic, signaling that the “spirit” of the plant has successfully moved into the liquid.
Step 6: Strain and Press
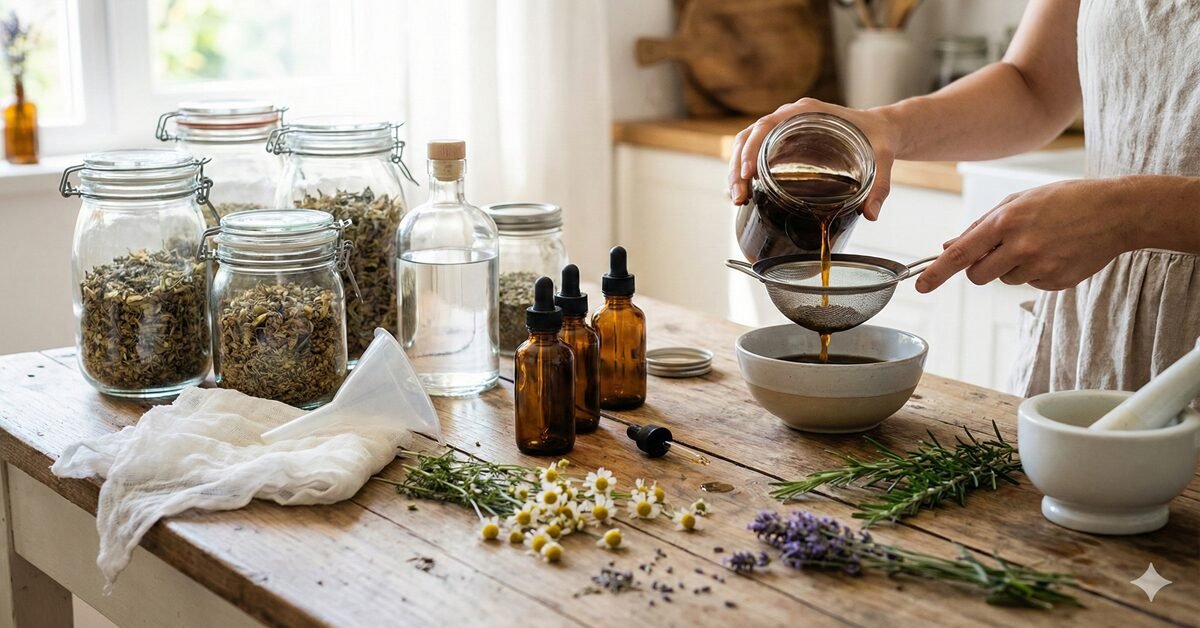
After your herbs have macerated for six weeks, the liquid should be dark, fragrant, and saturated with the plant’s beneficial compounds. Now comes the “harvesting” phase, where you separate the finished tincture from the spent plant material, known in herbalism as the marc.
The Setup
Place a fine-mesh strainer over a clean glass bowl. Line the strainer with several layers of unbleached cheesecloth or a clean muslin bag. Slowly pour the contents of your Mason jar into the cloth, allowing the liquid to filter into the bowl below.
The “Muscle” Step
Once the liquid has stopped dripping, gather the corners of the cheesecloth and twist it tightly. This is the most important part of the process: squeeze with as much strength as possible. The most concentrated medicinal properties are often held within the saturated plant tissues. By pressing the herbs firmly, you ensure that none of the potent extract is wasted.
What to do with the Marc?
According to traditional sustainable practices often highlighted by organizations like United Plant Savers, the leftover plant material (the marc) is rich in organic matter. Since you have extracted the medicinal “soul” of the plant, the remaining fiber can be returned to the earth. If you used an alcohol menstruum, the small amount of residual alcohol will evaporate quickly, making the spent herbs a perfectly safe addition to your compost pile.
Once you have collected every possible drop of your extract, you are left with a pure, powerful tincture ready for its final home.
Step 7: Labeling and Storage
The final step is perhaps the most overlooked, yet it is vital for the safety and longevity of your home apothecary. Once you have strained your extract, you must transfer it into a permanent container and document exactly what is inside.
Choosing the Right Bottle
Transfer your finished tincture into amber or cobalt blue glass dropper bottles. Dark glass acts as a filter for actinic light, which can trigger chemical reactions that spoil the extract. According to the American Herbal Products Association (AHPA), proper storage in light-resistant containers is a fundamental standard for maintaining the shelf-life and quality of botanical products. Ensure the caps are tightened securely to prevent evaporation of the alcohol or oxidation of the compounds.
The Importance of Detailed Labeling
It is easy to assume you will remember which dark liquid is which, but after six months, many tinctures look and smell remarkably similar. Every bottle should have a label containing:
The Common and Latin Name: (e.g., Elderberry / Sambucus nigra) to avoid confusion between different species.
The Solvent Used: Note the type of alcohol and its proof (e.g., 80-proof Vodka).
The Date Bottled: This helps you track the 3–5 year shelf life.
The Source: Mention if the herbs were homegrown, wild-harvested, or purchased.
Ideal Storage Conditions
When making your own tinctures, store your finished bottles in a cool, dry, and dark place. A dedicated medicine cabinet or a wooden box in a pantry is ideal. Avoid storing tinctures near the stove or in a humid bathroom, as fluctuating temperatures can compromise the extract’s stability. When stored correctly, an alcohol-based tincture can remain potent for several years, providing you with a reliable, ready-to-use remedy whenever it is needed.
Safety and Dosage Tips
Before you begin using your handmade remedies, it is essential to understand how to administer them safely. Because tinctures are concentrated extracts, they are much more powerful than a standard cup of herbal tea.
Understanding Standard Dosage
A common “rule of thumb” for adult dosage is 20–40 drops (roughly 1/4 to 1/2 teaspoon) taken two to three times per day. You can take the drops directly under the tongue for rapid absorption or mix them into a small glass of water or juice to mask the strong taste of the alcohol. However, dosage can vary significantly based on the herb and the individual. The American Herbalists Guild recommends consulting with a qualified professional to tailor herbal protocols to your specific health needs.
Key Precautions
Contraindications: Some herbs can interact with prescription medications or are unsafe during pregnancy and breastfeeding. For instance, St. John’s Wort is known to interact with many pharmaceuticals.
Allergies: Always do a “patch test” with a single drop to ensure you don’t have a localized reaction to a new plant.
Medical Consultation: As noted by the Mayo Clinic, herbal supplements are not regulated with the same rigor as drugs. Always inform your primary healthcare provider about any tinctures you are adding to your routine.
Conclusion
Making your own tinctures is more than just a cost-saving measure; it is a way to reclaim a direct connection with the natural world and take an active role in your own health. By following these seven simple steps—from selecting high-quality herbs to labeling your finished amber bottles—you have transformed simple ingredients into a potent, long-lasting medicine chest.
The beauty of herbalism lies in its lifelong learning curve. As you become more comfortable with the “Folk Method,” you can begin experimenting with different solvents, herb combinations, and specialized ratios. You’ve moved from being a consumer of wellness products to a creator of natural remedies.
What will you brew first? Whether it’s a calming Valerian extract for better sleep or a spicy Fire Cider for winter wellness, let us know in the comments below!
For more guides on natural healing, check out our recent post on The Top 10 Most Powerful Healing Herbs You Need to Know About.
Frequently Asked Questions (FAQ)
Q. Why is my tincture cloudy?
A. Cloudiness is usually caused by "precipitation," which occurs when the chemical constituents of the herb (like resins or minerals) react to changes in temperature or when the alcohol-to-water ratio shifts. It is generally safe to use, but you can filter it through a coffee filter if you prefer a clearer liquid.
Q. Can I use dried herbs from my spice cabinet?
A. Technically, yes, but for medicinal purposes, you want the freshest material possible. Most culinary spices have been sitting on shelves for months and may have lost their therapeutic potency. It is better to source high-quality, organic dried herbs from a reputable supplier.
Q. I forgot to shake my jar for a week! Is it ruined?
A. Not at all. While daily shaking is ideal for maximum extraction, missing a few days won't ruin your tincture. Simply give it a good shake now and try to get back into the routine for the remainder of the maceration period.
Q. How do I know if my tincture has gone bad?
A. Alcohol-based tinctures rarely "spoil" in the traditional sense because alcohol is a powerful preservative. However, if you see visible mold growing on the surface (usually caused by herbs peeking above the liquid line) or if it develops a sour, "off" smell, discard it and start over.
Q. Is there a way to evaporate the alcohol before taking it?
A. Yes. If you want to avoid the alcohol content, you can add your dose to a small cup of near-boiling water. Let it sit for 5–10 minutes; much of the alcohol will evaporate, leaving the herbal constituents behind in the water.
Q. Can I use a plastic jar if I don't have glass?
A. It is strongly discouraged. Solvents like alcohol and vinegar can leach chemicals out of plastic containers over time. Stick to glass Mason jars to ensure your medicine remains pure and free of endocrine-disrupting chemicals.